Want to reduce waste and get a quality natural fertilizer? Making your own compost is simple, economical, and effective, whether you live in a house or an apartment.
This guide details the methods (bin, pile, worm composting, bokashi), the materials to compost, mistakes to avoid, and the steps to succeed without odors.
Official resources (ADEME, ministries, FAO) and practical tools support you to compost smartly all year round.

Sommaire
Compost: definition and benefits
Compost is the result of the controlled decomposition of organic materials (kitchen and garden waste) by microorganisms, producing an amendment rich in humus that improves soil structure, life, and fertility.
Properly managed, composting significantly reduces the gray bin, limits emissions related to landfill, and provides a natural “booster” for vegetable gardens, flower beds, and potted plants.
Key point: a “successful” compost is dark, crumbly, odorless (no foul smell), and hardly shows the original waste anymore.
2025 context and regulatory framework
Since 2024, local authorities are required to offer source sorting solutions for biowaste (local composting, separate collection), which facilitates household action across the territory.
Practically, depending on the municipalities, this can take the form of individual or shared composters, voluntary drop-off points, or dedicated food waste collection.
For official advice and practical rules, consult ADEME guides (methods, key actions, mistakes to avoid) as well as ministerial information pages.
- ADEME — 5 rules to successfully make your compost
- Ministries — Everyone to compost!
- ANIL — Compost and biowaste sorting: what’s changing
Brown/green materials: what to add or avoid
To avoid odors and pests, the balance between “brown” materials (dry, carbon-rich) and “green” materials (wet, nitrogen-rich) is essential. In practice, alternate inputs and aim for a balanced mix over the weeks.

Quick sorting table
| Brown materials (carbon) | Green materials (nitrogen) | To avoid |
|---|---|---|
| Dead leaves, straw, brown cardboard, uncoated paper, sawdust, wood chips, shredded twigs | Peelings, plant scraps, coffee grounds and filters, tea bags without staples, grass clippings (in thin layers) | Meat, fish, dairy products, fats/oil, carnivore droppings, excess ashes, diseased plants, invasive seeds |
Tip: always keep a bag of dry “browns” nearby (cardboard, leaves) to quickly rebalance after adding too wet kitchen scraps (greens). ADEME guides emphasize the importance of mixing and particle size (shred coarse materials) for good aeration.
To learn more about the brown/green balance and key actions, rely on the technical resources:
- ADEME — Essential rules (mixing, shredding, aeration, moisture)
- FAO — Composting Handbook (technical guide)
Step-by-step to get started
1) Choose the location
- Outside: ideally bare soil (for soil fauna), light shade, accessible all year round.
- Inside: worm composter or bokashi bucket, temperate place, no direct sunlight, airtight lid for bokashi.
%20(3318886335).jpg)
2) Prepare the base
- Lay a draining/structuring layer (twigs, torn cardboard, straw) to promote aeration.
- In a closed bin, consider a fine mesh under the composter to limit rodent access.
3) Alternate layers
- Start with “browns,” then add your kitchen “greens,” and so on.
- Avoid large amounts of a single type (e.g., large quantities of grass clippings), mix and cut into pieces.
4) Aerate and adjust moisture
- Stir more often at first (hot phase), then every 4–8 weeks.
- Moisture: “wrung-out sponge” appearance. Too dry → add greens/water; too wet → browns/shredded material.
5) Maturation and use
- Mature compost is dark, crumbly, with a forest floor smell. Sift if necessary.
- Depending on the method, expect 4–12 months before use (worm composting faster, bokashi → short fermentation then soil maturation).
Official and illustrated step-by-step guides are available, including practical sheets from ADEME and local authorities.
4 methods to choose from (bin, pile, vermicompost, bokashi)
1) Bin Composting
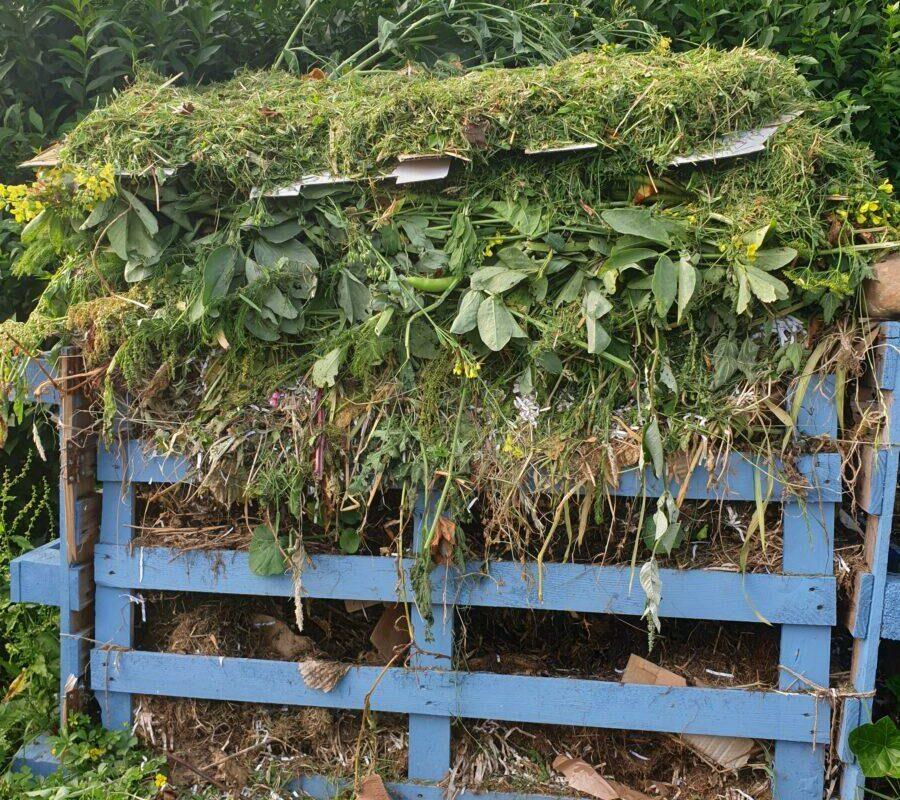
The bin (wood/plastic) structures the volume, limits scattering, and facilitates integration into the garden. It is suitable for most households with an outdoor space.
- Advantages: clean, compact, retains heat, modular (multi-bin).
- Points to watch: aerate regularly, manage moisture, access to walls for turning.
2) Pile Composting
The ground pile is the simplest and most economical method. Ideal if you have a garden and a large volume of green waste, with easy access for turning.
- Advantages: flexible, quick temperature rise, easy to turn with a fork.
- Points to watch: risks of drying out or runoff, aesthetics, pests if poorly balanced.

3) Vermicomposting (indoors)
This method uses compost worms (Eisenia fetida, Eisenia andrei) that quickly transform your bio-waste into soil amendment and “compost tea.”
- Advantages: odorless if well managed, compact, ideal for apartments.
- Points to watch: avoid temperature extremes, add in portions, avoid excessive citrus/garlic/onion.
Useful resources: Zero Waste France booklet (PDF), Vermicompost sheet (principles and species).

4) Bokashi (anaerobic fermentation)
Bokashi is a fermentation in an airtight bucket with wheat bran inoculated with effective microorganisms (EM). The fermented waste is then lightly buried in the garden or added to a compost to finish transforming.
- Advantages: very compact method, fast (2–4 weeks), accepts small amounts of cooked leftovers.
- Points of attention: strict airtightness, management of the “juice” (to be diluted before use), further maturation in soil.
To start: airtight bucket with tap, its inoculum (to buy or make yourself), tamping at each addition, regular draining of leachate and calm fermentation.
Maintenance, aeration and humidity
Success depends on a few key actions: mix regularly, crush coarse elements, maintain a “wrung sponge” humidity and ensure good aeration.
- Aeration: include structuring materials (twigs, shredded material), stir every 4–8 weeks.
- Humidity: if too wet → add browns; too dry → add greens/water, cover the pile.
- Temperature: an active compost “heats up” at the start; avoid massive additions during severe frost periods.
Official references: ADEME — 5 rules for success.
Troubleshooting: odors, gnats, rodents…
Unpleasant odors
- Likely causes: excess moisture, lack of air, too many “greens”.
- Corrections: add dry browns (torn cardboard, leaves), stir, drain the bottom, cover the top.
Gnats and flies
- Prevention: cover each kitchen addition with a thin layer of browns, keep the lid closed (bin), avoid overly sweet fruits on the surface.
- Action: stir, cover, balance browns/greens, traps nearby if needed.
Rodents
- Prevention: fine mesh under the composter, avoid putting meat/fish in it, carefully cover additions.
- Action: move, elevate, reinforce walls or switch to a closed bin if the pile is too exposed.
Compost that does not heat up / stagnates
- Causes: lack of nitrogen (greens), pile too small, cold weather, lack of moisture.
- Corrections: add greens (peelings, grass clippings in thin layers), stir, lightly moisten, increase volume (≥ 1 m³ for a true hot phase).
Pro tip: in case of prolonged rain, cover the pile (breathable fabric, cardboard, perforated tarp) to avoid “soup compost”. In summer, limit evaporation with surface mulching.
Tools, accessories and costs
You can compost with very little equipment. The essentials: a container adapted to the space and some stirring/cutting tools.
- Composting bin: 300–800 L depending on household/garden size; wood or recycled plastic.
- Tools: fork, compost aerator, pruning shears, small shredder (optional but useful).
- Worm composter: multi-tray with tap for “tea”, starter bedding and Eisenia worms.
- Bokashi kit: airtight bucket with tap + its inoculant (EM), measuring cup, press for packing.
On the budget side, many local authorities subsidize or provide composters at a reduced price; inquire at your town hall or on your metropolitan area’s website.
Using your compost in the garden and in pots
- In the vegetable garden: 2–5 L/m² as maintenance fertilizer, incorporated superficially in autumn/spring.
- At planting: mix 20–30% mature compost with the backfill soil.
- Mulching: semi-mature compost on the surface to feed the soil and limit evaporation.
- Potted plants: 10–20% in the repotting mix, or as a fine surface layer in spring.
Complete your “living soil” approach with mulching and garden mulching, and optimize your sorting actions through source sorting of biowaste.
2025 Trends and Useful Resources
Domestic composting is becoming widespread, driven by public policies on biowaste sorting, collective composting systems, and citizens’ desire to reduce household footprints.
To go further, explore these reference resources (guides, advanced methods, practical frameworks):
- ADEME — 5 Rules for Success
- ADEME — Domestic Composting Guide (PDF)
- Ministries — Everyone to Compost!
- ANIL — Biowaste Sorting (2024 Framework)
- FAO — Farmer’s Composting Handbook (PDF)
FAQ
What is the ideal brown/green ratio?
In practice, alternate inputs and keep a stock of “browns” to correct excess moisture. Guides emphasize less a fixed ratio than monitoring odor, texture, and moisture (wrung-out sponge) and regular turning.
My compost attracts rodents: what should I do?
Install a fine mesh under the bin, bury the perimeter slightly, avoid meat scraps, pack and cover the inputs. Prefer a closed bin and turn to limit anaerobic zones.
Can composting be done in an apartment?
Yes: choose vermicomposting (Eisenia worms) or a hermetically sealed bokashi bucket. Both are compact, fast, and odorless if you follow good practices.
How many bins are needed?
The “2-bin” system is comfortable: one bin for ongoing inputs and one for maturation. In a pile, you can dedicate a zone to each phase. Vermicomposters already have multiple trays.
Is “compost tea” a fertilizer?
Leachate (bokashi or worm compost) should be heavily diluted before watering (for example 1:10 to 1:20). Use occasionally and avoid putting it on leaves sensitive to the sun.
Conclusion
Making your own compost is an ecological and economical act with a strong impact, accessible to everyone with some good practices: balancing browns/greens, aerating, controlling moisture, and choosing the method suited to the space.
Whether it’s a bin in the garden, a pile, a worm composter, or a bokashi bucket, the key is regular inputs and light but attentive monitoring.